
K-3: The Changing of the Film Gate to Super 16mm
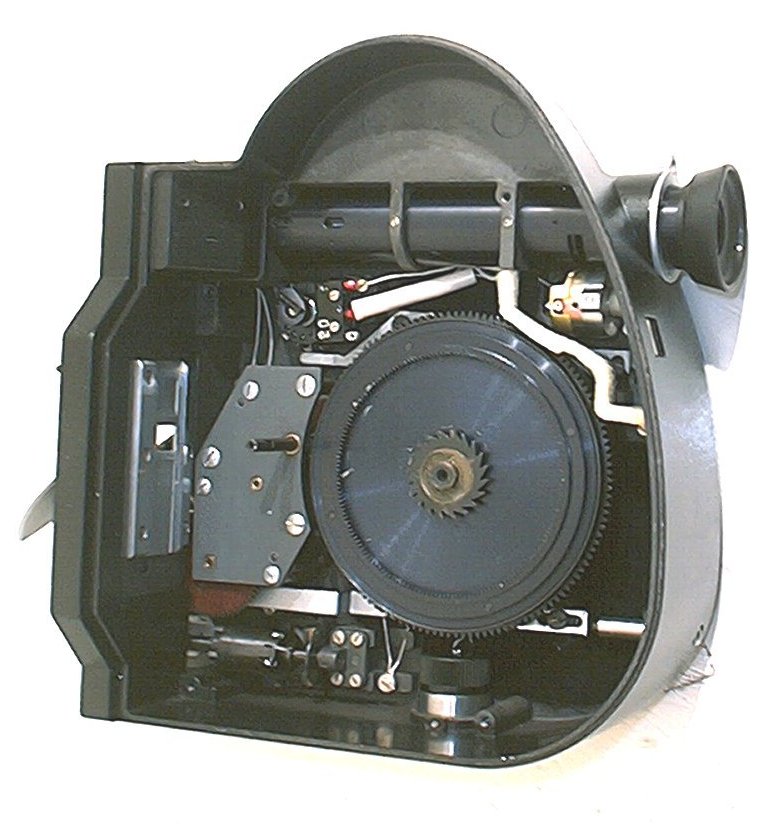
You can see how the gate is held in. There are three screws visible with the camera assembled. There are two more screws hidden under the baffle plate. The two hidden screws have slightly thinner heads then the three visible screws.
Step 1
It is important to reattach the main driving
sprocket in the same relative position as it was removed. So,
before loosening it, either neatly scribe a line across it
and the main drive shaft for later reference or dab it with
some paint. You can see a dab of yellow paint on this K-3.
Press the shutter button to wind down the spring!
Remove the gate (pull out), the film cutter (two screws), the plastic guide right below the drive sprocket (pull off) and the six screws holding the baffle plate.
Do not remove any other
screws!
Especially the screws on
the top of the feed and takeup spindle. One of them has a
reverse thread and will break off if you try to remove it.
Step 2
The main driving sprocket is held in place with two setscrews. Loosening these setscrews will allow the entire baffle plate to lift off. Don't remove them, just loosen them.
The main driving sprocket will stay "trapped" in the film guides.
This entire baffle plate lifts out easily once all the screws
have been removed. You will have to guide it past the pulldown
claw. If you have forgotten to wind down the spring you find
out about it now!
Check the bottom of the main drive sprocket. There might
be some thin spacing washers stuck to it. If there are, remove
them and slide them onto the sprocket
drive shaft. There is also a black foam ring (easily visible
in the photo below) and a little plastic ring on the drive
shaft. If it falls off, just stick it back on.
There are five screws holding in the gate. The top three
screws are generally easy to remove. The bottom two screws
have a narrow slot and aren't as thick as the top
three.

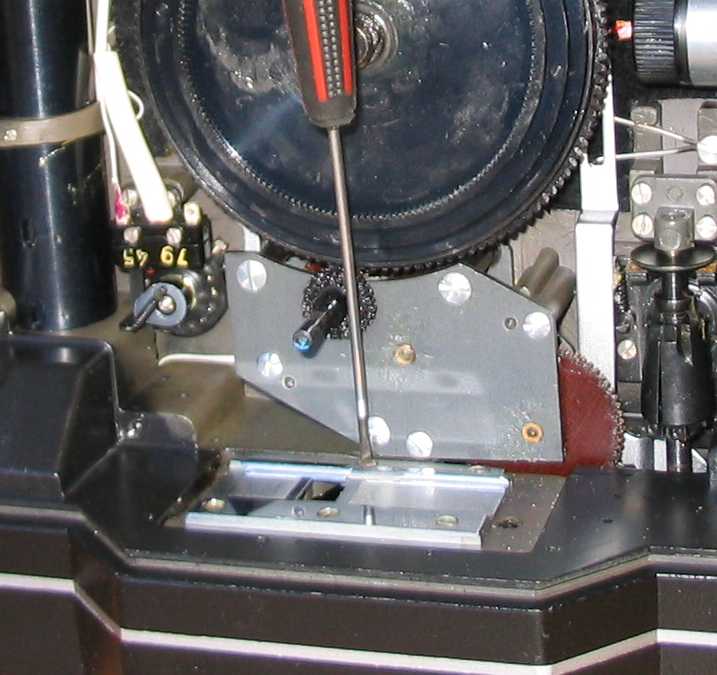
To remove the bottom two screws, rest the K-3 on the lens
mount. Put the screwdriver tip in the center of the screwhead.
Push firmly on
the rotating top with the ball of your hand to flex the screwdriver
shaft so that is perpendicular to the screwhead. Turn the
screwdriver with your free hand. The screw should
crack free. Repeat with the other tiny screw, and then the
three screws along the top.
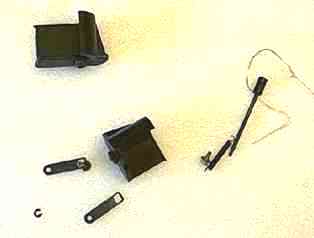
While you've got the camera open, you can also remove the
loop formers. It will make the camera manual loading.
Unscrew the two screws under the loop formers and remove
the associated 'plumbing'. Shown above are the pieces that
get taken out.
Reassembly
To reinstall the baffle plate, first make sure the three pawls are aligned with the little spring-wires. The pawls prevent the main spring from unwinding.
When you put the baffle plate back in, you might have to turn the wind handle to make the pawls engage the gear.
Sometimes the baffle plate will appear to go in, but does not seat properly.
Turn the wind handle while pressing down the trigger. If the takeup sprocket does not turn, this means the baffle plate is not seated properly. The takeup sprocket is driven by the inner-gear on the mainspring.
Don't worry if you have to remove and try again one or more times. It can take a few tries.

You can also try taking the rachet gear off the end of the spring and sticking it on the baffle plate, holding it there with the spring-loaded pawls. Sometimes that works easier.
When your certain the baffle plate is seated properly, screw
it in with the six screws.
You then have to reattach the drive sprocket in the correct alignment. Check your paint marks or scribed line.
You also must set the correct height for the sprocket. If
it not at the correct height the film will not feed
properly.
The teeth on the sprocket must go in between the channels
on the film guides. It is relatively easy to move
the sprocket up-and-down to get it working properly.
A tiny distance can make the difference between
your K-3 just chewing film or running smoothly.
Snap the plastic guide back on. After you've verified the
camera is running properly, you can re-attach the
film cutter. Then look around for something to cover the
two slots on the baffle plate where you removed the loop
formers. Black gaffers tape works well.